How to Use the Subway in NYC (Easy to Follow NYC Subway Guide)
So you’re wondering how to use the subway in NYC? When you’re in the Big Apple, navigating the city can seem like a daunting task, especially if you’re new to the hustle and bustle. That’s where the NYC subway comes to the rescue and I am going to break down the ins and outs of the New York subway, making it a breeze!
The New York subway is not just a way to get around: it’s the best way to get around New York City. It operates 24/7, 365 days a year. There are 36 subway lines (and more coming soon) that stop at close to 500 stations across 4 of the 5 NYC boroughs. That means that you’ll never be left stranded in the City that Never Sleeps.
Plus, riding the subway in NYC is the most affordable option. You’ll be spared the wallet-draining costs of taxis and rideshares or the endless waits in traffic. And riding the subway in NYC is definitely easier than driving a car in NYC or searching for where to find parking in NYC.
And for those scared or apprehensive about riding the subway, don’t worry, I will cover all the best tips for riding the subway. Nearly 3.2 million people ride the NYC subway every day – so it’s really not as scary or bad as you might have heard on the news. But more on that later.
You might be a visitor looking to explore, a newcomer to the city, or maybe you’re a local who hasn’t quite mastered the subway system yet. This NYC subway guide will give you the inside scoop on how to make the most of this convenient mode of transportation. Let’s dive in and demystify the art of how to use the NYC subway!
How Much Does the NYC Subway Cost & How to Pay
First up in our NYC subway guide is, of course, the money. Understanding the cost and how to pay for your subway rides is crucial for making the most of your New York subway experience.
The basic subway ride is $2.90 per ride. (And if you’re 65 or older, or if you’re a person with disabilities, you might be eligible for a discounted fare rate.) That means that for less than $3, you can get from one end of the city to the other!
This fare includes not only your initial ride but also any necessary transfers between different subway lines (as long as you don’t leave the station).
Do you need to switch from one line to another to reach your destination? Don’t worry – it’s all covered under that one fare.
How to Pay for the Subway
There are two options to pay for the subway. By a MetroCard and by a credit/debit card that has tap as a payment option.
Here’s how to get a MetroCard. This is a reloadable card that you’ll use to pay every time you ride the subway. There’s an initial $1 fee each time you get a new card, so don’t lose it unless you want to pay for another card! (You also don’t want to lose your funds on your card!)
You can purchase MetroCards at special vending machines located inside subway stations, near the entrance to the train platform. Some of the machines accept cash, all accept credit card as payment.
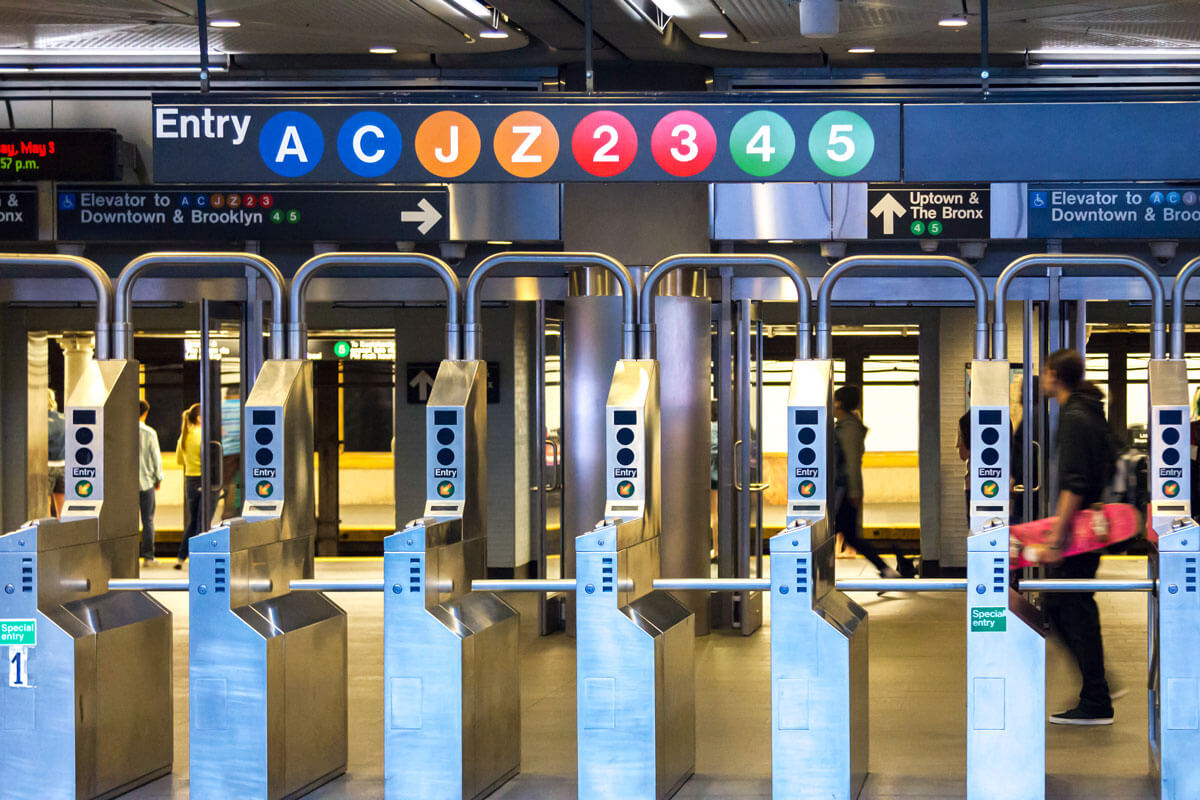
Once you have a MetroCard and it’s loaded with funds, just slide your card along the strip at the top of the turnstile, listen for the click, and head through to the platform!
Now for the tap payment option. This payment option is through OMNY, the new tap-to-pay system that’s now available at the turnstiles of all regular subway stations.
You can simply tap your credit or debit card, or your favorite banking app, wherever you see the OMNY readers at turnstiles and gates. This offers a more modern, convenient, and contactless way to pay for your rides.
Bonus: OMNY offers free transfers and trips! Just use the same payment method at OMNY readers to transfer for free. Or if you use the same card or app to pay for your trips 12 times (once you’ve spent $34) over 7 days, all rides the rest of the week are free!
Unlimited Ride MetroCards
For anyone spending a significant amount of time exploring NYC via the subway, you might consider an unlimited week or month pass. These passes are an affordable option for regular subway riders.
Also, it’s important to note that Unlimited Ride MetroCards are for individual use only. Once you swipe it, there’s an 18-minute delay before you can use it again. So, while you could technically use it to pay the fare for 2 people, you’d have to wait 18 minutes between swipes, which isn’t worth it!
It’s better just pay per ride. Still, Unlimited Ride Metrocards are a great deal if you’ll be using the subway frequently.
Note: If you just have a regular MetroCard (not an Unlimited ride MetroCard) you can swipe multiple people in through the turnstile if you have the funds loaded on that card.
Kids Ride for Free
For those traveling with little ones, the subway in NYC can be accommodating, but you have to know the rules. Up to 3 children under 44 inches in height can ride for free when accompanied by a fare-paying adult. It’s a family-friendly feature that makes exploring the city more accessible for everyone!
Still not sure if you’re up for riding the subway in NYC with kids? The key is to be prepared and enjoy the ride. we’ll share tips for navigating the MTA with kids later on in our NYC subway guide!
AirTrain
New York City’s AirTrain is a convenient train service that’s sole purpose is to connect John F. Kennedy International Airport (JFK) that connects the airport’s terminals, parking, and transportation options. It links to the New York subway and Long Island Railroad, helping travelers reach the city and region easily.
It’s cheaper than taxis and convenient if you have luggage. And it’s a great time-saving time option if you’re heading to JFK, especially during rush hour.
You usually transfer to the subway or train from the AirTrain to get to wherever you’re going in the city.
AirTrain rides are $8.50 a ride, on top of your regular train or subway fare. You can pay this with a regular MetroCard, you just need to make sure you have enough funds. Or you can use OMNY and tap your credit card.
The unlimited week or month pass doesn’t include AirTrain rides, so plan accordingly for your airport transfers.
The easiest way to pay? You’ll find MTA’s OMNY Readers located inside both the Howard Beach and Jamaica subway stations that connect you to AirTrain.
What About Transfers?
You may think you can learn how to use the NYC subway without dealing with transfers, but they’re an important aspect for anyone riding the subway in NYC. This means you can transfer seamlessly between subway lines as long as you don’t leave the subway system.
Also, once you swipe your MetroCard, you can transfer to an MTA bus for free within two hours. This allows you to transfer from subway to bus, bus to subway, or bus to bus. This flexibility makes it easy to reach your final destination without additional costs!
Not sure if the subway line near you will connect you to your desired destination? Many of the subway lines connect on same the train platform or through connecting train stations. This means you can transfer to different subway lines without leaving the system (i.e. without going outside the subway turnstiles where you swipe your Metrocard and have to pay again to re-enter).
To make your trip a piece of cake, consider using an app, like The MTA App or Citymapper, which will lay out every step you need to take to get to where you’re going. Next, we’ll go over all the best NYC subway apps and how they benefit you.
Just keep in mind that if you exit the subway quickly and try to re-enter, you’ll be charged another fare! If you think you’ll need to re-enter the subway system to switch lines, it might be more cost-effective to take a bus instead. This way, you can still enjoy a free transfer.
Best NYC Subway App & Navigation
If you’ve ever looked at a map of the New York subway, it looks like a colorful bowl of spaghetti. It’s a user-friendly system, but it’s vast and intricate, so it’s crucial to have the right tools at your disposal.
These days, no NYC subway guide would be complete without going over the best NYC subway apps! We’ll go over those first, and then share valuable tips for navigating the subway like a seasoned New Yorker.
Google Maps – For thousands of travelers, Google Maps is a trusted companion for getting around NYC. You probably use it for driving, but it’s also an excellent choice for the NYC subway. Simply enter your current location and your destination.
Google Maps will provide you with detailed instructions on which subway lines to take and where to transfer. It’s user-friendly and the best NYC subway app for first-time subway riders. Just be aware that GPS can be unreliable when you’re underground between stations.
The MTA App – The MTA (Metropolitan Transportation Authority) offers an official app for New York City’s public transit. This app was made to provide accurate and real-time information on subway schedules, service alerts, and planned service changes.
However, it’s still in beta and has been known to be down for hours or days at a time. Check back in the future with this one, because it has some great ideas for locals and visitors riding the subway in NYC!
Citymapper – This is a fan favorite among New York subway riders. Many people think it’s the best NYC subway app because of its user-friendly interface and thorough transit data. It offers detailed subway information and includes real-time arrival data, like service disruptions and down-to-the-minute notifications on when your train will arrive at the station. It includes walking directions to nearby stations, transfer options, and information on accessible stations. Citymapper also includes ride- and bike-sharing options.
Transit App – If you’re looking for a real-time companion, the Transit App is your best bet. It not only provides you with subway schedules and service alerts but also helps you get better timing information. We also love the way it’s streamlined to look and feel like the signage in the subway system. It’s truly the best NYC subway app for both vetted and first-time subway users who want to minimize wait times and make the most of their MTA experience.
Navigating the New York Subway
Now that you have the best NYC subway apps at your fingertips, we’ll share our best advice for navigating the New York Subway. The key here is paying attention to signs.
Understanding the Subway Lines
The New York subway is a network of lines that crisscross the city. When planning your route, pay close attention to the different lines, their colors, and their destinations.
Be cautious about express trains because they skip some stops. These can be faster, but might not take you exactly where you want to go.
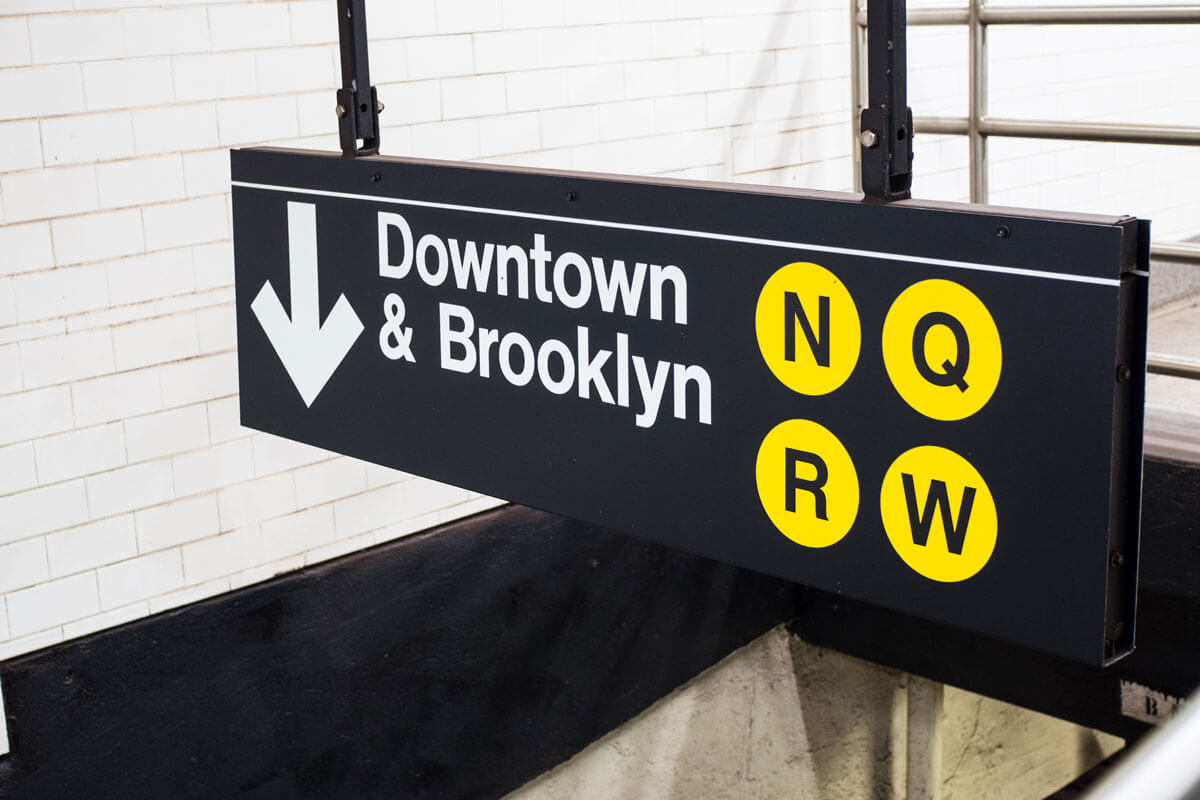
To figure out which direction/platform you need, look for signs indicating Uptown or Downtown. The “Uptown” direction generally means heading north or to Manhattan, while “Downtown” means heading south or away from Manhattan.
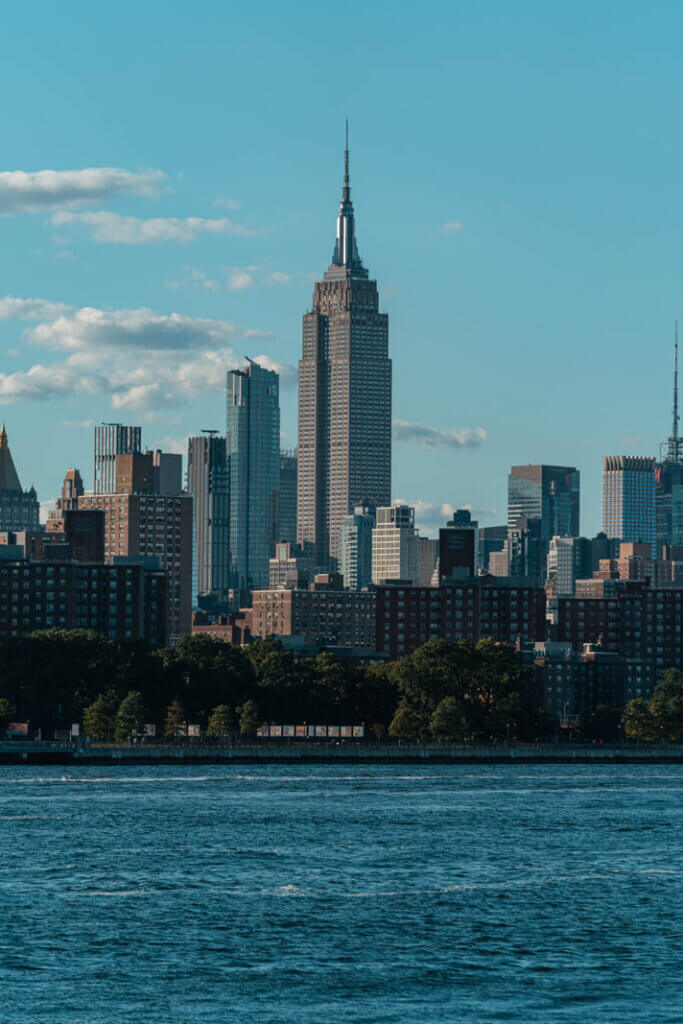
This also depends on where you’re at in the city, if you’re at the World Trade Center and you want to get to the Empire State Building, you’ll need to head Uptown.
If you’re still confused, you can always consult your handy-dandy NYC subway app of choice. It’ll confirm the correct platform and direction for your destination.
Transferring Between Lines
Transfers are a common part of navigating the New York subway when your destination requires you to take 2 (or more) different train lines.
For example, let’s say you’re in the Financial District, and you want to go to the MET on the Upper East Side. The train station closest to you is the J, and that train won’t take you to Museum Mile. However, the NYC subway system connects the J to the 6, and then you just have to walk a few blocks to the MET!
The important thing to remember when making transfers is to follow signs and be prepared for lots of walking. There might be a long walk from one platform to the other, so don’t dilly-dally around. Time is of the essence in the NYC subway system! And pay close attention to signs, because you may need to switch platforms, but you don’t want to accidentally leave the station.
For beginners, if you have the choice between a direct route with no transfers and one with transfers that don’t add much travel time, go with the most direct route without transfers.
Consider our scenario where you’re going to the MET. You could skip transfers and just do a little extra walking by just taking the 6 train all the way Uptown. Once you gain confidence and experience, you can explore more intricate routes that involve transfers.
Often times transfers might only save 10 minutes, if you’re unfamiliar with the subway you could spend that trying to navigate to your next train.
General NYC Subway Tips
Now you know how to pay for your New York subway trip, you have your favorite app handy, and you have a good idea of how to navigate the train system! You should feel confident in how to use the NYC subway, even as a newbie. Still feeling nervous? We’ve got some essential tips and insider knowledge so you can conquer the NYC subway like a pro.
In this section of our NYC subway guide, we’ll dive into general tips that will help you make the most of your subway experience. It’s full of invaluable information that everyone riding the subway in NYC can use, whether you’re a first-time rider or a seasoned commuter!
NYC Safety Tips for Everyone
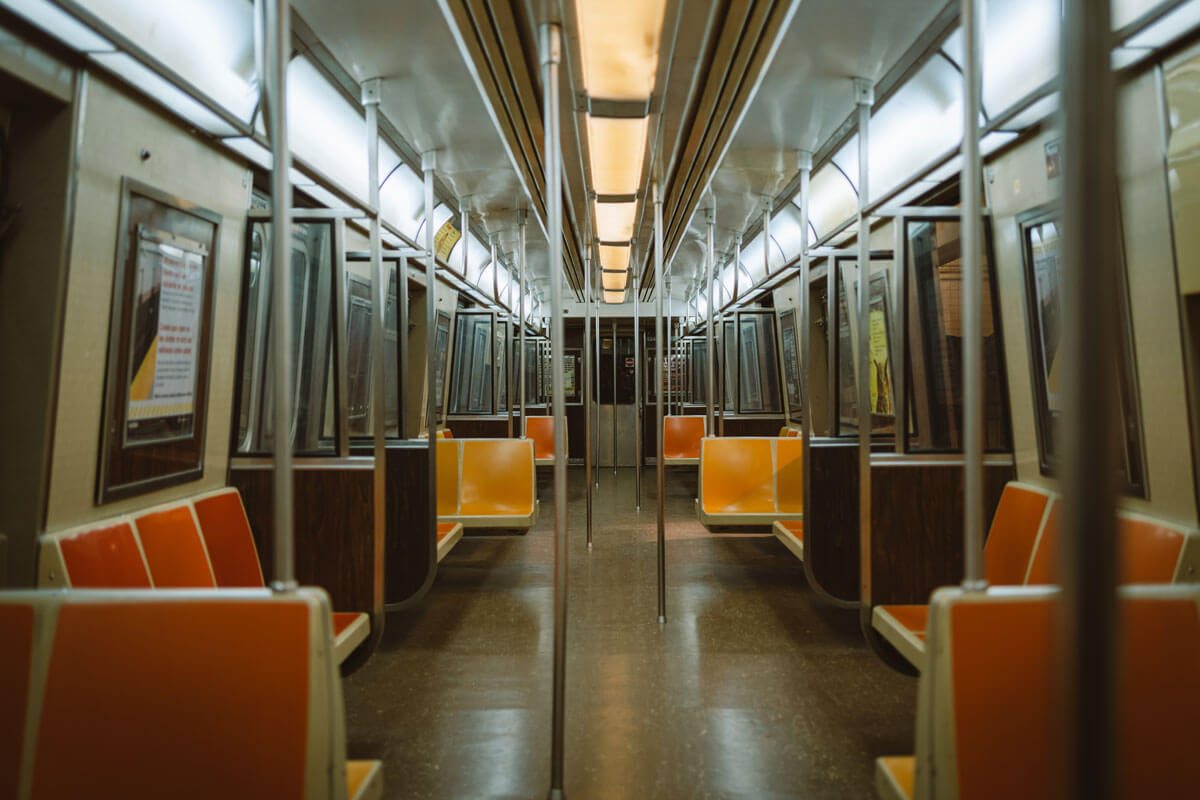
Avoid Empty Cars – If you encounter an empty subway car during rush hour when other cars are crowded, there’s usually a reason. Don’t believe us? You might be in for an unpleasant surprise! It’s best to steer clear and find a more populated car.
Don’t Talk to Strangers – Despite our unsavory reputation, New Yorkers can be quite welcoming and helpful! But when you’re on the train, it’s wise not to engage in lengthy conversations with strangers, especially if you’re unsure of their intentions.
You can ask a fellow traveler for directions but keep it short, people will help guide you in the right direction. If you need more assistance, ask an MTA attendant.
Keep an Eye on Belongings – The subway can get crowded, making it essential to keep a close eye on your belongings, especially valuables like smartphones, wallets, and jewelry. Don’t mindlessly wait on the platform with your phone out unless you want to risk it getting swiped.
Use bags with secure closures, don’t leave them unattended, and keep your items out of sight when not in use. If you’re carrying a backpack, don’t keep valuables in the front pocket, and consider wearing it on your front to save space.
Stay Alert – Be aware of your surroundings and keep an eye on your belongings. If you’re waiting for a train, standing in well-lit areas is safer, especially at night. It helps deter potential wrongdoers and allows you to see your surroundings clearly.
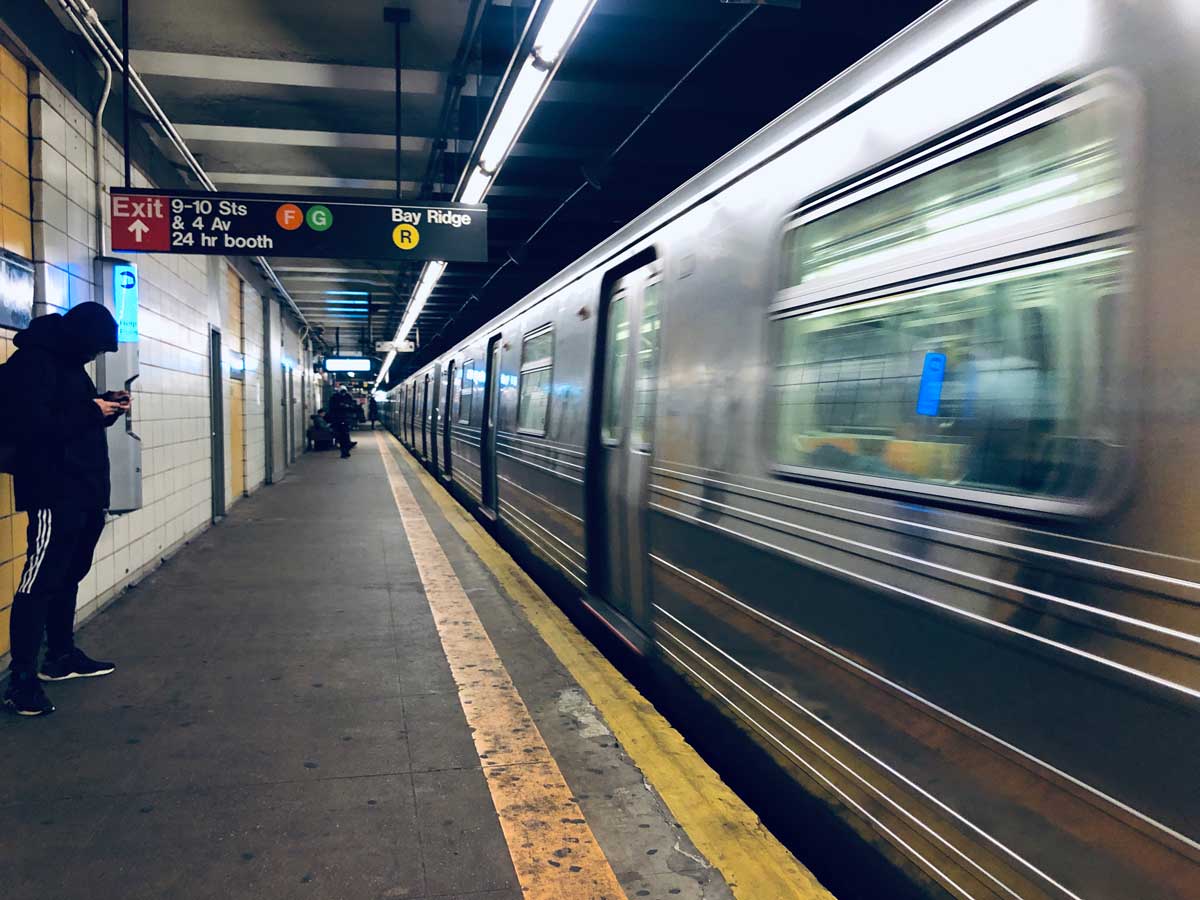
Stand Away from the Edge – While waiting for the subway, always stand away from the edge of the platform, at the open tracks. Pay attention to the yellow-painted safety lines on the platform and try to have your back closer to the center of the platform, or against a pillar or wall. Don’t cross the safety lines until the train has come to a complete stop and the doors have opened.
Riding with Kids – If you’re traveling with children, keep them close and wait for the train near the center of the platform. You might want to plan ahead and bring some quiet toys to keep them occupied on the train. Also, think about using a folding stroller that you can collapse if you end up boarding a packed train car. Or just use a sturdy baby carrier. Also, try to avoid traveling during rush hour when the subway is most crowded.
Avoid Late-Night Travel Alone – If possible, avoid traveling alone on the subway late at night. There’s safety in numbers, so consider using a rideshare service or taxi if you’re concerned about safety during the late hours.
Look for the Car with the Conductor – If you need to travel alone or find yourself in a position where you don’t feel safe, one option is to stay near the train conductor. They ride in the first subway car or in the middle one. For the middle car, look for the black & white-striped board over the center of the platform. When the train comes into the station, they’ll open their window under this board.
Wait Near the MTA Station Agent – Another option when you’re by yourself is to wait near the customer service booth at the entrance of every train station. These agents are there to help you purchase MetroCards and to assist if you need help.
Don’t want to enter an empty platform late at night? Wait near the station agent. Already paid your fare and got a weird vibe on the platform? You can always wait on the other side of the turnstile, which is in full view of the service agent.
Use Headphones Wisely – You might want to listen to music or podcasts with headphones while you enjoy a long subway ride. But you should be cautious of high volume levels and noise-canceling features. You need to remain aware of your surroundings, so don’t crank up the volume to a point where you can’t hear important announcements or potential issues.
Beware of Subway Performers – On some subway rides, you might encounter subway performers. Most are completely harmless and just want to offer entertainment to travelers for the occasional tip! But some can be unaware of the hassle they cause. While they can be entertaining, be cautious if they begin their routines in crowded cars. Maintain a safe distance to avoid getting bumped or injured.
Report Suspicious Activity – If you notice any suspicious activity or unattended bags, report it to transit personnel or call 911. These days, stations have pretty good cell service. It’s always better to be cautious!
Trust Your Instincts – If something or someone makes you feel uncomfortable, trust your instincts. Move to another subway car or a busier area and consider alerting the conductor or an MTA station agent if you feel unsafe.
Subway Etiquette
Let’s address this touchy subject: There’s a right and wrong way to act on the subway! The subway is user-friendly and made with tourists in mind, but it’s also the main way locals commute to and from work and school every day.
When you’re riding the subway in NYC, it’s important to be aware of your surroundings and keep others in mind as you move about. Here are a few tips from some seasoned subway pros when it comes to good subway etiquette:
Let People Exit First – When the subway doors open, allow those inside to exit before boarding. It’s a simple but crucial way to keep the flow of passengers moving.
Stay to the Right – Also remember to be aware of the flow of traffic when walking on the platform, down corridors, and riding escalators. This usually means staying to the right. You might take your time as you experience the subway system, but you don’t want to slow down someone on their way to work!
Consider Pregnant Passengers – If you see a pregnant passenger, do them the courtesy of offering your seat. This is as much for safety as it is for comfort.
Let’s Talk About Some Important Topics
When you’re learning how to use the NYC subway, there are a few important things to keep in mind. We wanted to spend a little more time on these particular topics since they’ll make the biggest difference when it comes to your subway experience.
Riding the Subway on the Weekends
On the weekends, the New York City subway can be a bit less predictable, due to maintenance and construction work. And many trains run on an alternate weekend schedule, where there’s reduced train service (fewer trains running compared to weekdays).
This is where the best NYC subway apps come in handy. You can use your favorite app to stay informed on what trains are running near you on the weekends, as well as about any real-time service changes or disruptions.
Read the Signs
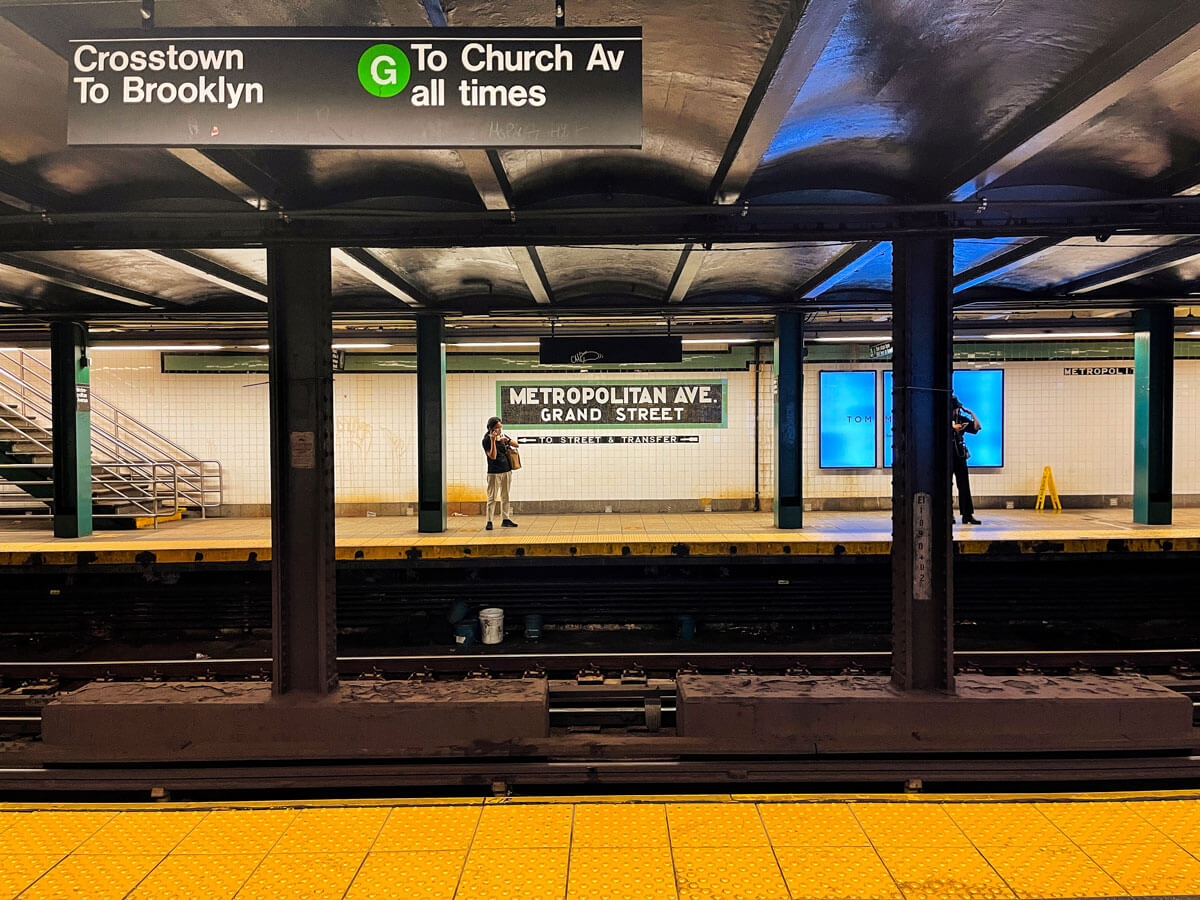
As soon as you enter the subway station, before you go through the turnstiles and to the subway platform, take a moment to read the signs. They’ll tell you which way is Uptown, Downtown, and to specific boroughs. It’s essential that the train you’re about to board is going in the direction you want.
This is usually something to look out for when you’re heading to your train from the turnstiles, or when you’re switching platforms for a transfer. There are also a few subway stations with trains that only go in one direction. The last thing you want is to pay your fare only to find out you’re in the wrong station!
If you’re using an NYC subway app or map, they should tell you where the correct station, platform, and train are located.
Transferring!
Transfers are common in the NYC subway system, allowing you to switch between different lines to reach your destination. If you think you might have a transfer, be prepared for the long walks, multiple stairways, and complex station layouts. Read directions and signs carefully before entering another train to avoid confusion. If you need help, you can ask an attendant (locals are usually willing to help, too!).
Accessibility!
It’s true, that New York Transit has major room for improvement when it comes to accessibility. While the MTA has a goal of 95% of subway stations being accessible by 2055, most currently are not, and it’s a problem.
Even at the current 25% of stations that are considered ADA-accessible, you might find the only elevator might be out of service (or just miserable to be inside of). Or there just might not be an accessible station near you. Both stations and subway cars are also supposed to be ADA-friendly and include signage and technology for those who are low-vision, blind, hard of hearing, and deaf. But they often don’t.
For travelers with mobility issues, it’s important that you know where accessible stations are located, and you can connect to a list of them through this link. You can also get up-to-date information on elevators and escalators for the MTA and LIRR by going to this link. If you enter a station and find that it’s not as accessible as it should be, you can ask the ticket booth attendant for help.
If you’re a wheelchair user or someone with mobility challenges and you’re looking for the best NYC subway app, we suggest either the Transit App or Citymapper.
Both also include information on wheelchair access at train stations, trains, and buses. Citymapper has app settings that modify walking times for those with disabilities, so you have an accurate ETA when you plug in your location and destination. And Transit App includes screen readers for blind and low-vision users.
Express vs. Local Trains: Know the Difference
Express trains skip some stops, making them faster but with fewer station options. They’re great for getting from one end of the city to the other the fastest. Local trains stop at every station along their route. If you’re going a short distance, stick to a local train.
If you’re not sure which one you need, ask an MTA station agent or check your subway app. It should give you accurate information when you plug in your destination.
MTA vs. LIRR vs. NJ Transit
The MTA (Metropolitan Transportation Authority) operates the subway and buses across all 5 boroughs (there’s no subway service on Staten Island). To use MTA services, you typically purchase a MetroCard for the subway and buses.
The MTA doesn’t include the Long Island Railroad (LIRR) and New Jersey Transit (NJ Transit). The LIRR is part of the larger MTA family but is separate from the subway and bus services. It provides a convenient way for you to go between Long Island and New York City.
NJ Transit is the state-owned public transportation system in New Jersey, providing bus and rail services across the state and into neighboring areas, including New York City. While NJ Transit services extend into New York City, it operates independently of the MTA.
All 3 services require separate tickets, which you can purchase through their respective apps or at designated kiosks.
Step-By-Step Recap for How to Use the Subway
- Look at directions and see what train/station you need to go to. Read the signs at the entrance before going in.
- Pay your fare (swiping a MetroCard sometimes requires practice as you can’t go too fast or too slow. The same goes for the tap method). If it won’t work, try another turnstile, as some are just wonky sometimes!
- Get to your subway. Read signs carefully and follow based on what train number/letter you have to go to. Also, note if you need to go Uptown or Downtown. Before getting on the train, make sure it’s not going express, unless you need to go express (as it skips many stops).
- Get off the train. You can see if your navigation tells you the most efficient exit. Sometimes it’s easiest just to get outside of the subway and navigate once you’re on the street and have signal again!
NYC has a Ferry Too!!
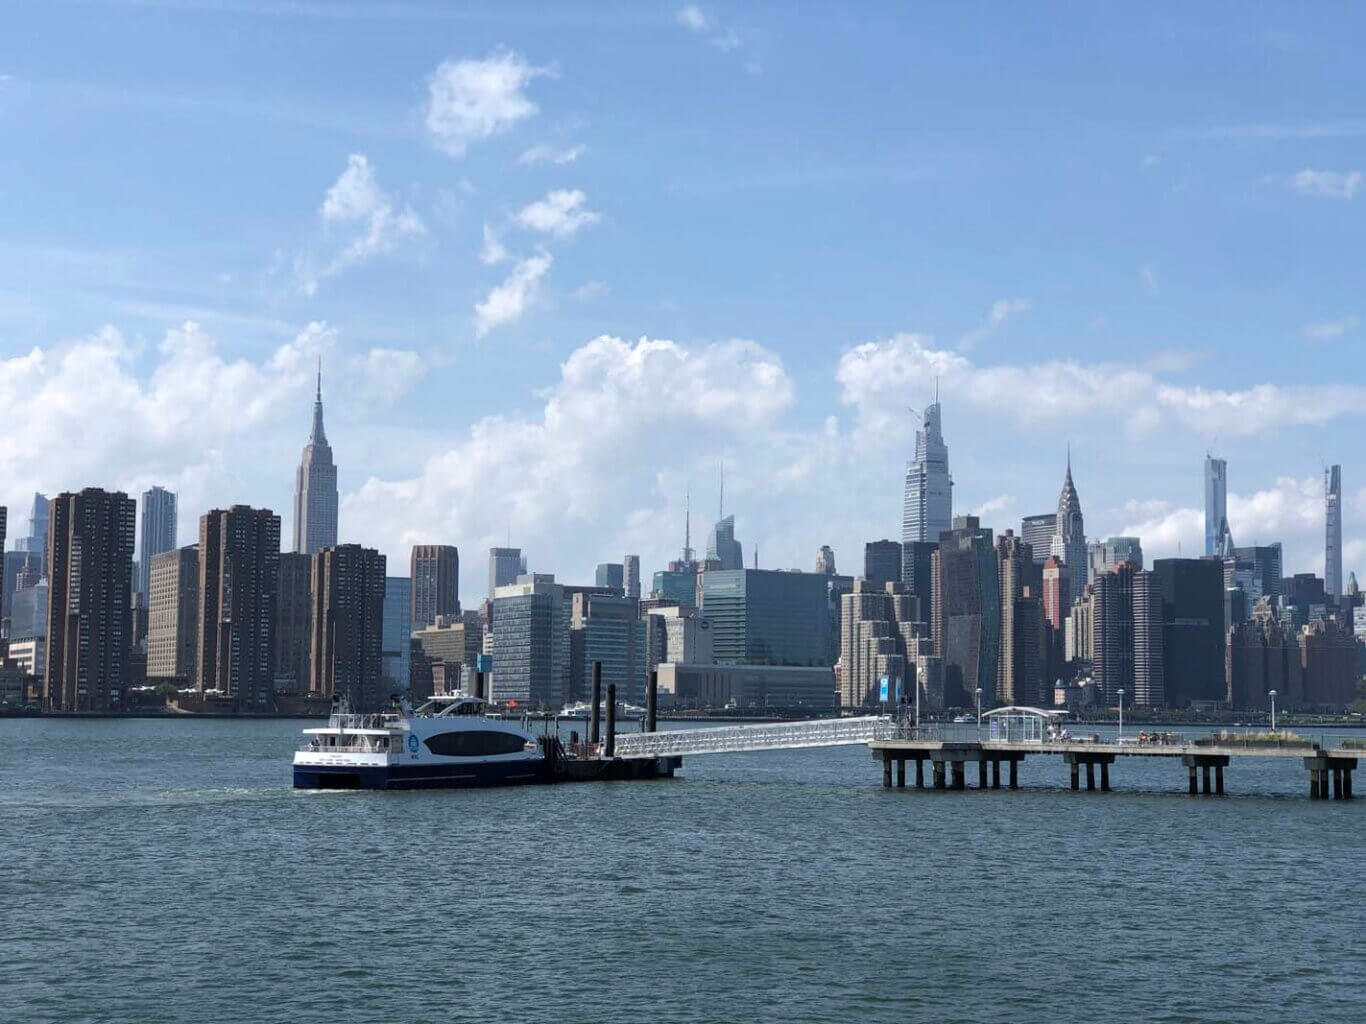
Depending on where you are and where you are going, there’s a ferry too! For visitors to New York City, the NYC Ferry provides an accessible, convenient, and scenic way to explore the city. It’s an excellent way to experience the city’s iconic skyline, bridges, and waterfront attractions. Here’s a breakdown of how to navigate the ferry in NYC.
How to Use the NYC Ferry
First, determine your destination and which ferry route serves that location. NYC Ferry offers multiple routes connecting different neighborhoods and boroughs. Popular routes include the East River route, the South Brooklyn route, and the Rockaway route.
NYC Ferry operates on a fixed schedule. Be sure to check the schedule for your chosen route to plan your departure and arrival times. And especially during peak times, you’ll want to arrive a little early so you can guarantee your spot on the boat. Ferries can fill up quickly.
Note: The NYC Ferry is separate from the Staten Island Ferry, which is free and only goes between Whitehall Terminal in Lower Manhattan to St. George Ferry Terminal in Staten Island. You don’t need a ticket, just simply board!
Note: A common NYC scam is that people might try to sell tickets to the Staten Island Ferry, don’t do it! You don’t need one as it’s free.
How to Pay for the NYC Ferry
You can buy tickets at the ferry terminal or use the NYC Ferry app. For visitors, the easiest thing to do is get a single-ride ticket for $4 (it costs less for those 65 years and older or individuals with disabilities).
With a single-ride ticket, you can make free transfers between ferries for up to 2 hours. You also can purchase a ticket at the ferry terminal at the small kiosk or use the NYC Ferry app to load funds onto a digital card for contactless payment.
Frequent riders can also save by purchasing a monthly pass that allows unlimited travel within a calendar month.
Popular NYC Ferry Routes
NYC Ferry routes are a great way to see different parts of the city and soak in some fantastic views along the way! Here are a few you might want to check out:
East River Route – This is a fantastic choice if you want stunning views of Manhattan. It connects neighborhoods like Long Island City in Queens, Murray Hill/Midtown East, Greenpoint, Williamsburg, DUMBO, and Lower Manhattan. You’ll be treated to iconic skyline sights as you glide along the East River.
Governors Island Route – This quick 8-minute ferry journey from Lower Manhattan to Governors Island offers a peaceful, car-free oasis in New York Harbor. Once there, you’ll discover green spaces, historic buildings, art installations, and more. You’ll also enjoy stunning views of iconic landmarks like the Statue of Liberty and the Manhattan skyline!
South Brooklyn Route – Take a ferry ride along Brooklyn’s waterfront, with must-see neighborhoods like Red Hook, Sunset Park, Bay Ridge, Brooklyn Heights, Lower Manhattan, DUMBO, and the Lower East Side. The views are simply beautiful, and it’s a unique way to see this borough.
Soundview Route – Travel to the Bronx, where you can explore the scenic waterfront and check out local attractions. It’s a bit off the beaten path, but worth the visit and connects from the Bronx down to Midtown and Lower Manhattan.
Helpful NYC Guides
Are you traveling to New York for the first time? We have more guides you might find helpful!
- 15 Ways for How to Spend a Day in NYC
- How to Spend 3 Days in NYC Itinerary
- How to Spend 4 Days in NYC Itinerary
- How to Spend 5 Days in NYC Itinerary
- How to Spend 7 Days in NYC Itinerary
- Best Areas to Stay in NYC
- Essential Visiting NYC Tips
To pay for the NYC subway, passengers can purchase MetroCards at vending machines or booths or use a tap payment option using a bank app or credit/debit card. For MetroCards you can choose between pay-per-ride or unlimited ride options. After loading value onto the card, they swipe it at turnstiles for entry.
You do not need a credit card to ride the NYC subway. Passengers can use cash to pay for and load a MetroCard to ride the subway and swipe it at the turnstiles for entry.
Yes, the NYC subway is generally safe, but travelers should remain vigilant, especially late at night. It’s advisable to stay alert, keep belongings secure, and avoid empty cars. Using well-lit stations and traveling in groups can enhance safety.
Yes, the NYC subway is relatively easy to use with a comprehensive network of routes and signage. Maps are available in stations, and digital apps offer real-time updates. Staff and fellow passengers often provide assistance if needed.
OMNY is a contactless payment system, allowing riders to tap and pay with a linked account or contactless card with tap payment. The MetroCard is a magnetic stripe card requiring swiping, with options for single or multiple rides and various fare types that can be purchased and loaded within the subway stations.